How-to: Query shortcuts#
With LinkAhead’s web interface, you can use shortcuts to execute commonly used search queries. These shortcuts allow queries to be stored and reused.
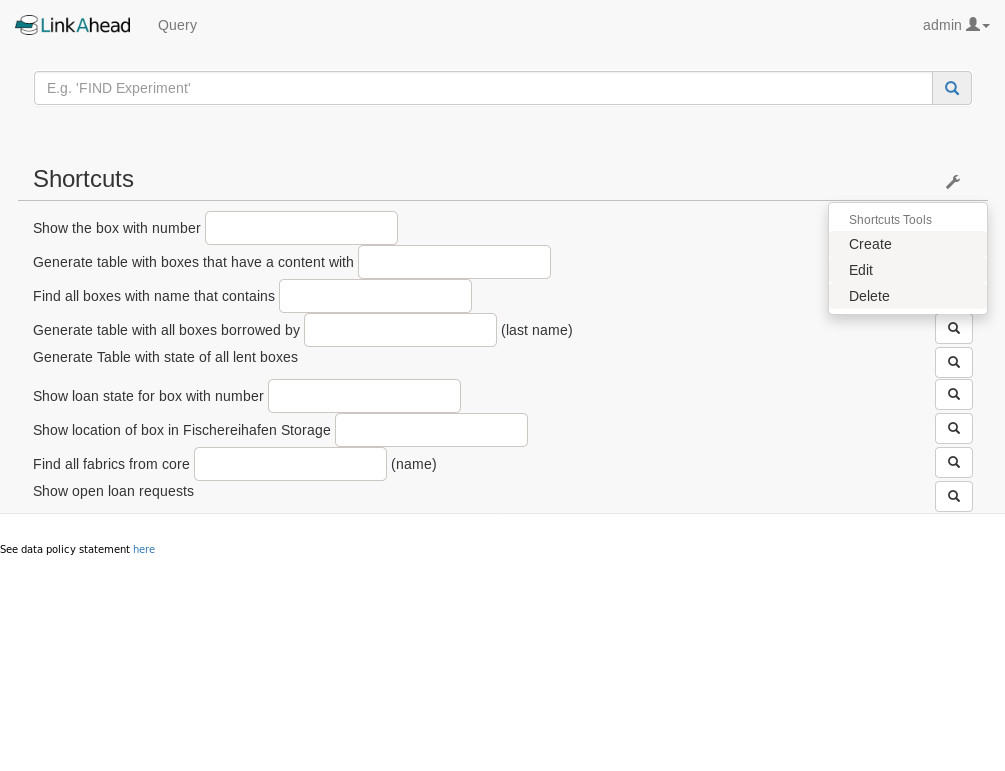
Shortcuts in the query panel. Note the toolbox for editing shortcuts in the top right#
Add query shortcuts (overview)#
There are two ways to integrate query shortcuts into LinkAhead’s web interface:
Query shortcuts can be added globally by an administrator, see: As administrator of the LinkAhead server
Users can add their own query shortcuts. This is described in As LinkAhead user. Note: This feature needs to be activated as described in Enable user query shortcuts.
As administrator of the LinkAhead server#
Server administrators may add global shortcuts. Add the shortcut definitions in LinkAhead’s profile
folder in custom/caosdb-server/caosdb-webui/conf/ext/json/global_query_shortcuts.json.
For an example, see Add global query shortcut.
As LinkAhead user#
User-defined templates can be defined by users and are only visible for the user who created them. In this sense, user-defined shortcuts are also private, whereas global shortcuts are always publicly visible.
User query shortcuts must be enabled on the server before users can create, change or delete them. See User-defined query shortcuts for actual how-to guides.
User-defined query shortcuts#
User-defined shortcuts are managed in the WebUI. This section describes how to create, update and delete them.
Create a new shortcut#
Note
User query shortcuts must be enabled on the server before users can create, change or delete them.
New query shortcuts can be generated by any authenticated user with sufficient write permissions.
In the web interface, click Query. In the Shortcuts section, click the wrench icon (on the right
side).
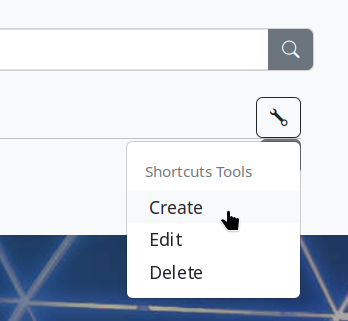
Select “Create” in the shortcut tools.#
In the drop-down menu, click Create.
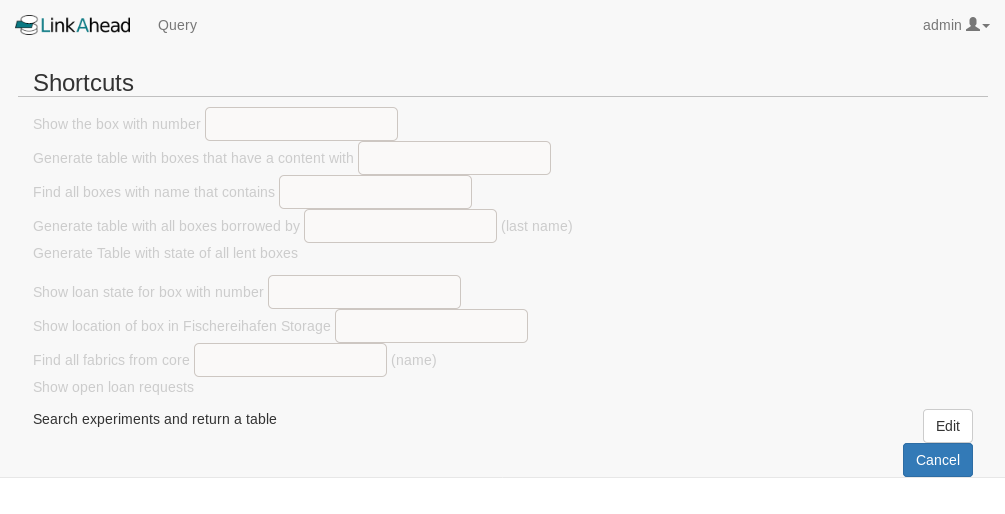
A form opens, with two input fields, Description and Query.
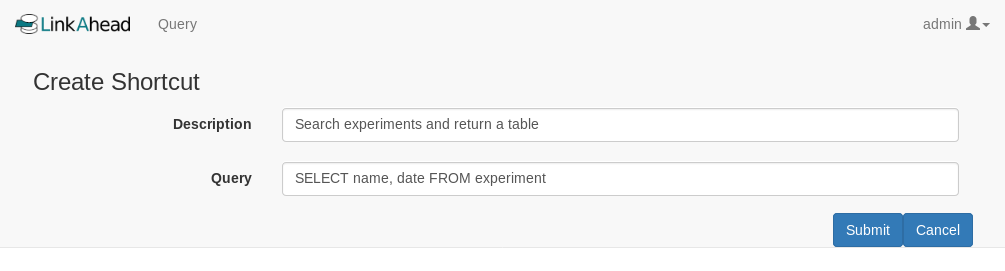
Create a new shortcut here.#
See Define a basic shortcut and Define an advanced shortcut for further explanation of the components of query shortcuts.
Edit the fields and click Submit for the creation of the new shortcut or click Cancel to cancel
the process.
The new shortcut will now be shown in the shortcuts section.
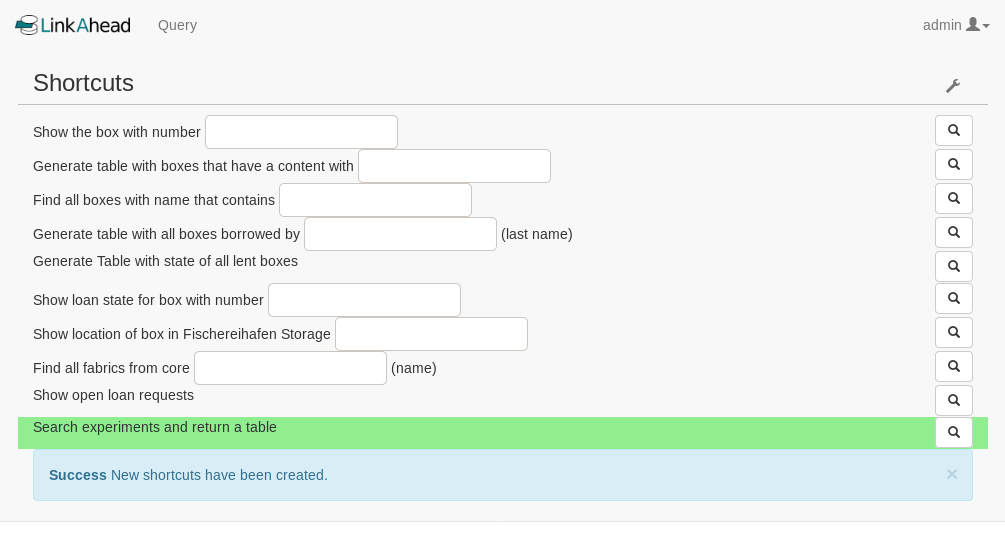
The view when creation was successful#
Change an Existing Shortcut#
Note
User query shortcuts must be enabled on the server before users can create, change or delete them.
Existing Query Shortcuts which are visible in your shortcuts section can be edited directly in the shortcuts section.
In the web interface, click Query. In the Shortcuts section, click the wrench icon (on the right
side).
Select “Edit” in the shortcut tools.#
In the drop-down menu, click Edit.
Choosing which shortcut to edit#
Every editable shortcut will receive a new button Edit (note: global shortcuts are not editable in
the webinterface at all).
Click Edit of the shortcut that is to be changed.
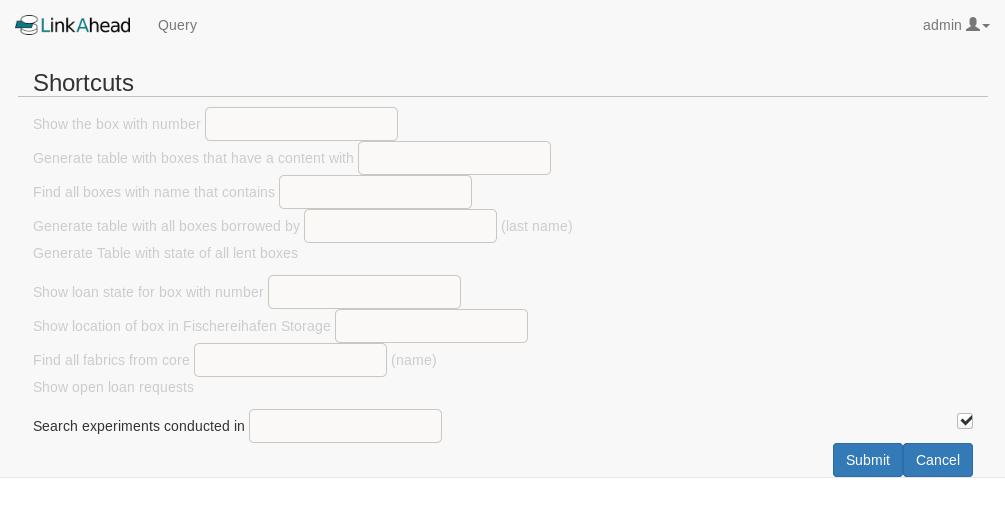
A form opens, with two input fields, Description and Query. Both fields are pre-filled with the
current settings.
See Define a basic shortcut and Define an advanced shortcut for further explanation of the components of query shortcuts.
Edit the fields and click Submit for the creation of the new shortcut or click Cancel to cancel
the process.
The updated shortcut is shown in the shortcuts section.
Delete an Existing Shortcut#
Note
User query shortcuts must be enabled on the server before users can create, change or delete them.
Existing Query Shortcut which are visible in your shortcuts section can be edited directly in the shortcuts section.
In the web interface, click Query. In the Shortcuts section, click the wrench icon (on the right
side).
Select “Delete” in the shortcut tools.#
In the drop-down menu, click Delete.
Choosing which shortcuts to delete#
Every user-defined shortcut now has a checkbox to denote which shortcut to delete and Delete and
Cancel buttons appear at the bottom of the shortcuts section. (Note: global shortcuts are not
deletable in the webinterface at all.)
Tick the checkbox of all the shortcuts you want to delete and click Delete, or click Cancel to
cancel the deletion process.
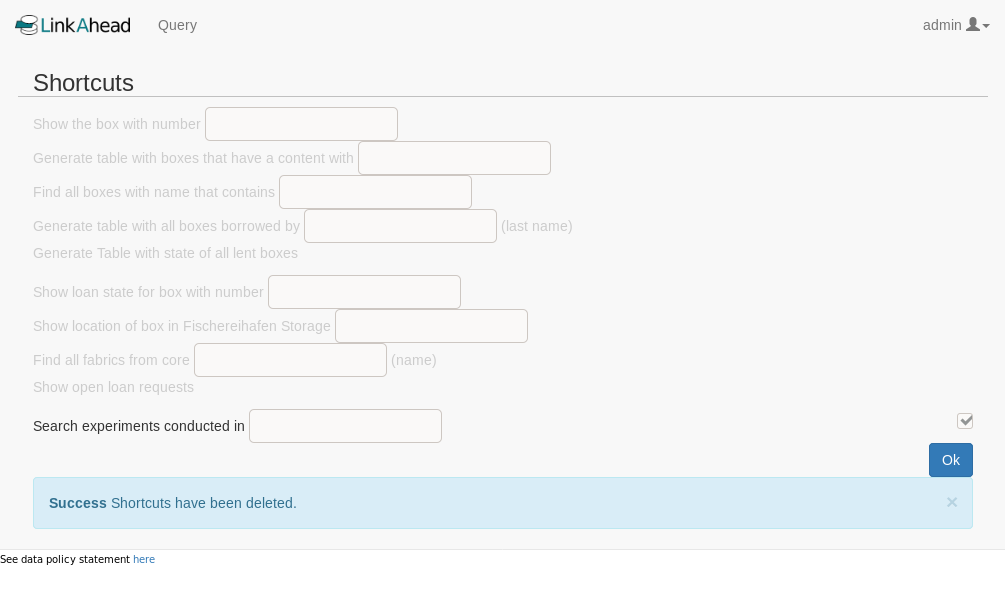
Successful delete#
All deleted shortcuts are marked as deleted afterwards and will not appear again in the shortcuts section after reload.
Define a basic shortcut#
A shortcut definition consists of two parts, the Description and the Query.
The Description is a human-readable description of the query, e.g. “Search for experiments and
return a table with the results.”. This text is visible to users in the shortcuts section.
The Query is the query text that will be executed with the shortcut. It must be a valid LinkAhead
Query Language (LQL) text, for more see the LQL overview.
For example, the following would be a useful shortcut definition:
Description: "Search experiments and return a table with the results."
Query: "SELECT date, quality_factor FROM MusicalAnalysis"
Define an advanced shortcut#
The basic shortcut may not always be enough, it does not allow for any changes in parameters. It is just a plain text, much like a bookmark. This how-to explains how to add placeholders.
Detailed explanation
Placeholders in the text use a special definition syntax to define parameters of the shortcut. The parameters can be set by the user at the time of the execution.
A placeholder always starts and ends with curly brackets:
{year}The text inside the brackets (the placeholder’s id) may contain any combination of alphanumeric characters (0-9,a-z,A-Z) and a few special characters like
-,_. Other characters are forbidden or discouraged.Both components of the query shortcut (description and query) must contain the same placeholders. If there is a
{year}in the query, there must be a{year}in the description.Each placeholder id must occur only once in both components – if you need to use two years in your shortcut you could use for example
{year1}and{year2}.
Suppose you want to search for experiments by their year. The query for that would be
SELECT date, quality_factor FROM Experiment WITH date IN 2018.
With advanced shortcuts, you can let the user choose the actual year in this query, by replacing the
year 2018 with {year}:
Description: "Search experiments in year {year} and return a table with the results."
Query: "SELECT date, quality_factor FROM MusicalAnalysis WITH date IN {year}"
Attention
The Description now must also contain this placeholder {year}:
“Search experiments in year {year} …”.
When the shortcut is displayed in the shortcuts section, there is a text input field instead of the placeholder and the user can type a year there. The executed shortcut inserts this user text as the year.
Add global query shortcut#
To add a query shortcut that is available to all users on the server, independent of the database’s
content, edit custom/caosdb-server/caosdb-webui/conf/ext/json/global_query_shortcuts.json in the
server profile.
The following example for the file global_query_shortcuts.json would create two global query shortcuts for finding experiments. The second example includes a variable for specifying the year.
[
  {
    "description": "Show a list of all MusicalAnalysis Records.",
    "query": "FIND MusicalAnalysis"
  },
  {
    "description": "Show a table of Experiments for year: {year}",
    "query": "SELECT date, project, identifier FROM Experiment with date in {year}"
  }
]
The above json shows examples for:
an advanced shortcut which can include placeholders that can be filled by the users
Enable user query shortcuts#
The default schema of LinkAhead servers does not include the {term}
RecordTypes <RecordType> which are needed for the user query shortcuts.
The solution is to create the necessary RecordTypes. With Python, you can add them like this:
import linkahead as db

schema = db.Container()
schema.extend([
    db.Property("Query", datatype=db.TEXT),
    db.Property("templateDescription", datatype=db.TEXT),
    db.RecordType(
        "UserTemplate"
    ).add_property("Query", importance=db.OBLIGATORY
                   ).add_property("templateDescription", importance=db.OBLIGATORY),
])
schema.insert()  # Actually insert the schema
This data schema is also included in tools/query_template_datamodel.yml in linkahead-webui.
To import it into your LinkAhead instance using the advanced user tools,
either run: python -m caosadvancedtools.models.parser --sync query_template_datamodel.yml
Or run this Python code:
from caosadvancedtools.models import parser

schema = parser.parse_model_from_yaml("linkahead-webui/tools/query_template_datamodel.yml")
schema.sync_data_model()